Mailgun Configuration
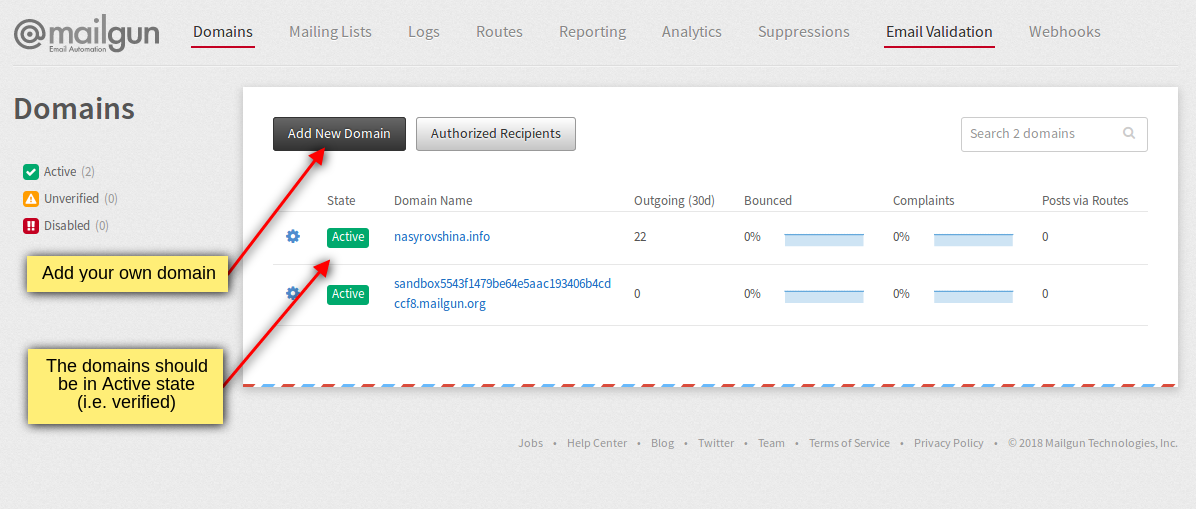
Manage Domains
Note that the state of your domain should be Active to be able to use it from Odoo side. To verify it follow the instruction How do I verify my domain
Note that the state of your domain should be Active to be able to use it from Odoo side. To verify it follow the instruction How do I verify my domain
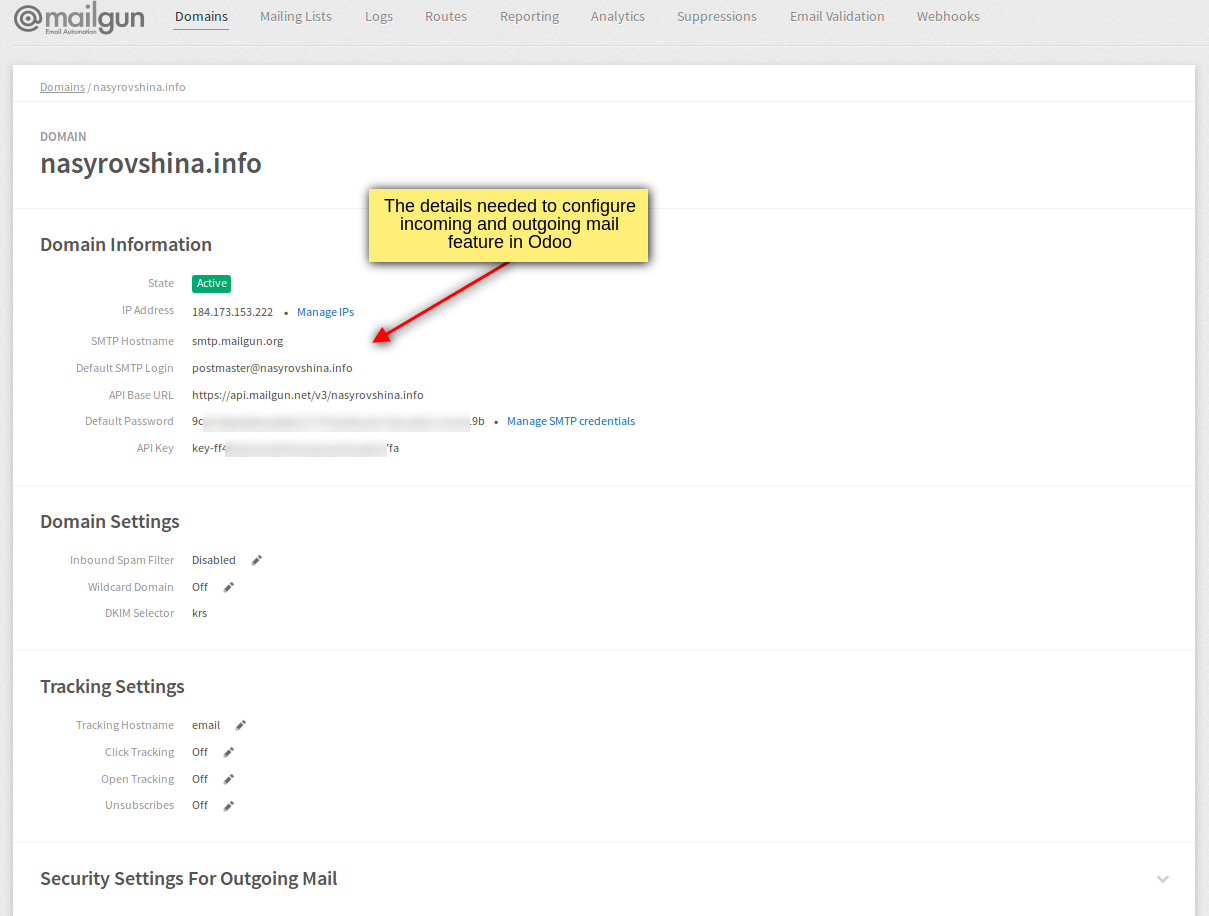
Click on added domain name and see all the information needed to configure your Incoming and Outgoing mail feature.
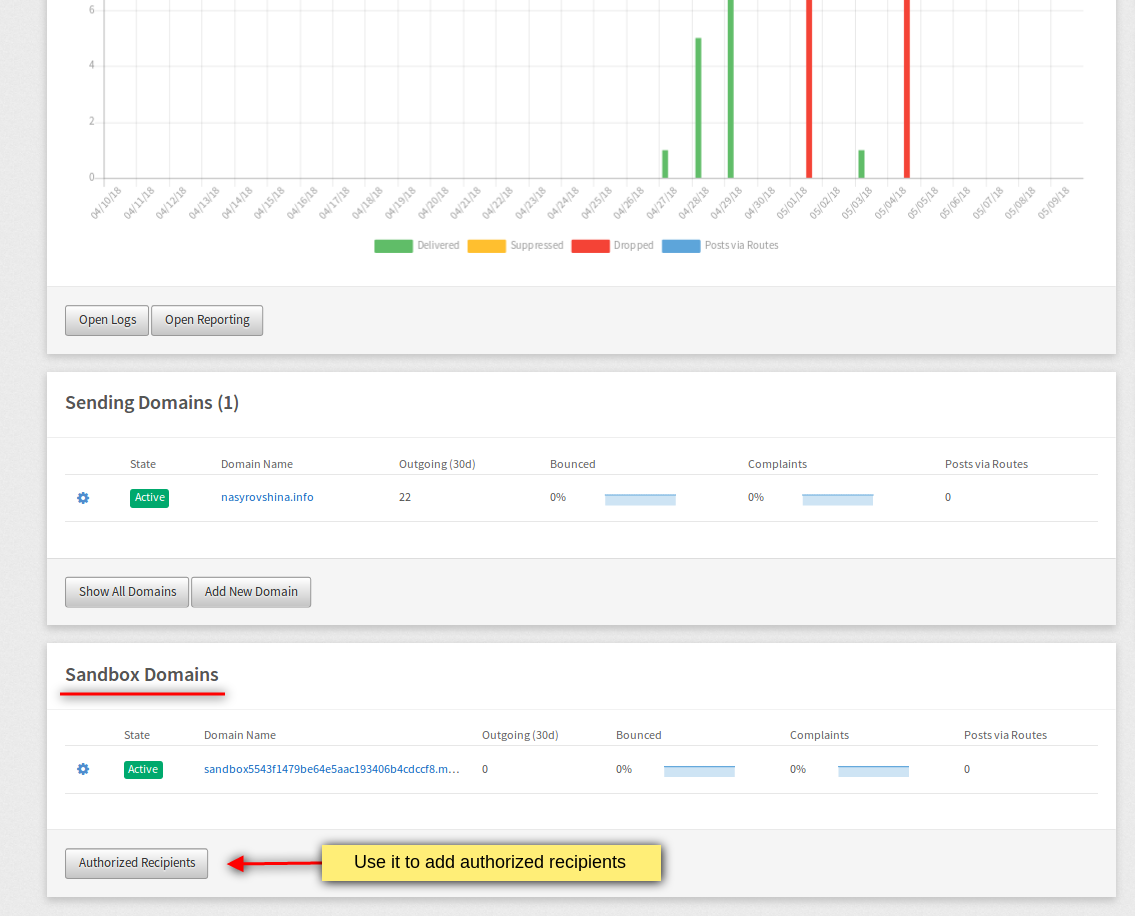
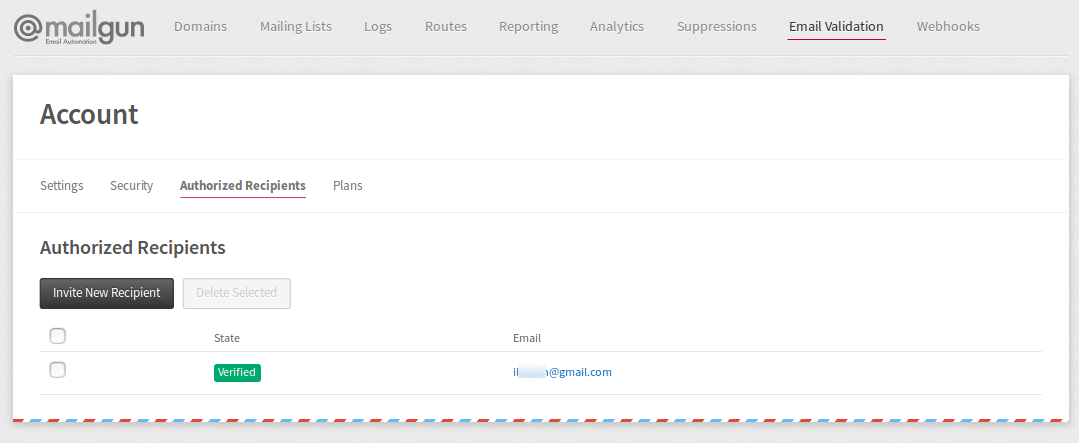
If you use sandbox domain, add Authorized Recipient first (sandbox domains are restricted to authorized recipients)
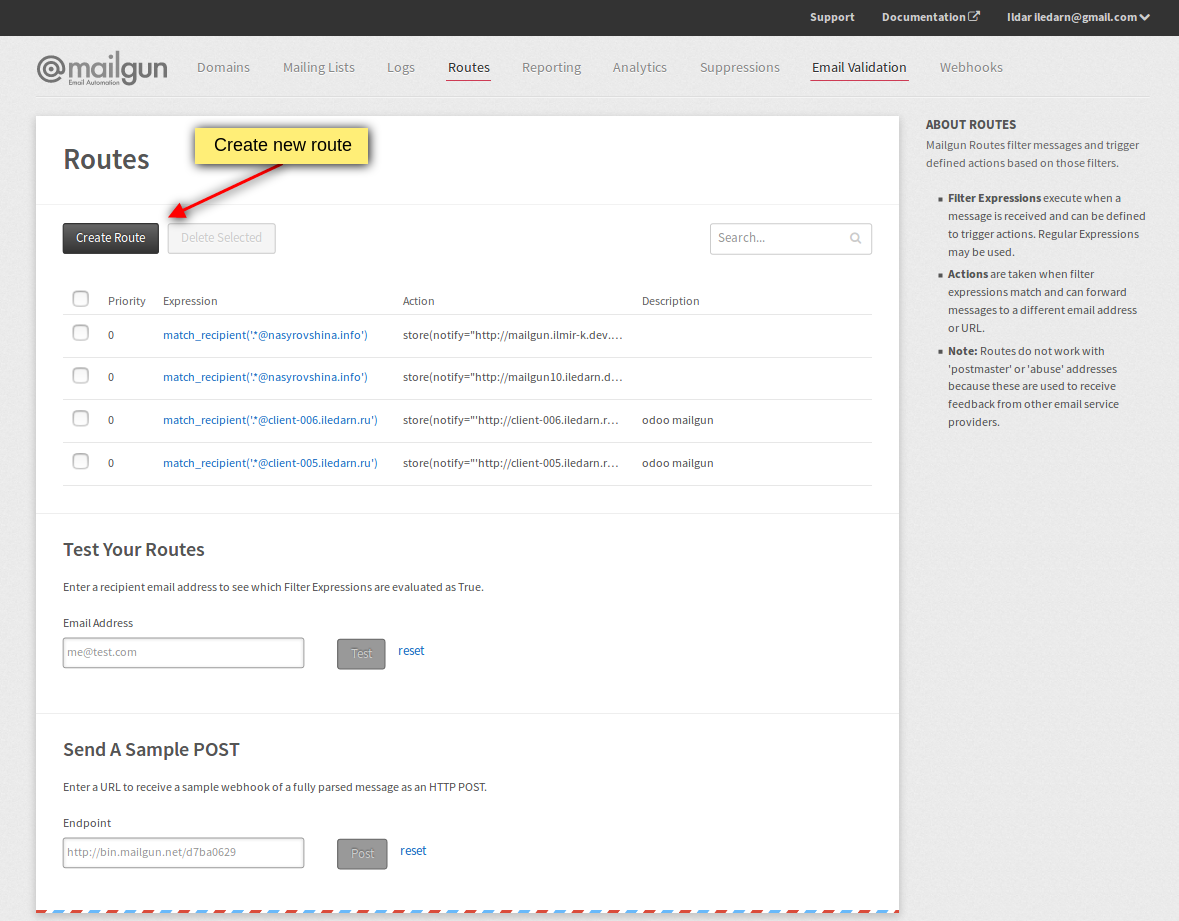
Navigate to Routes menu and create a new route
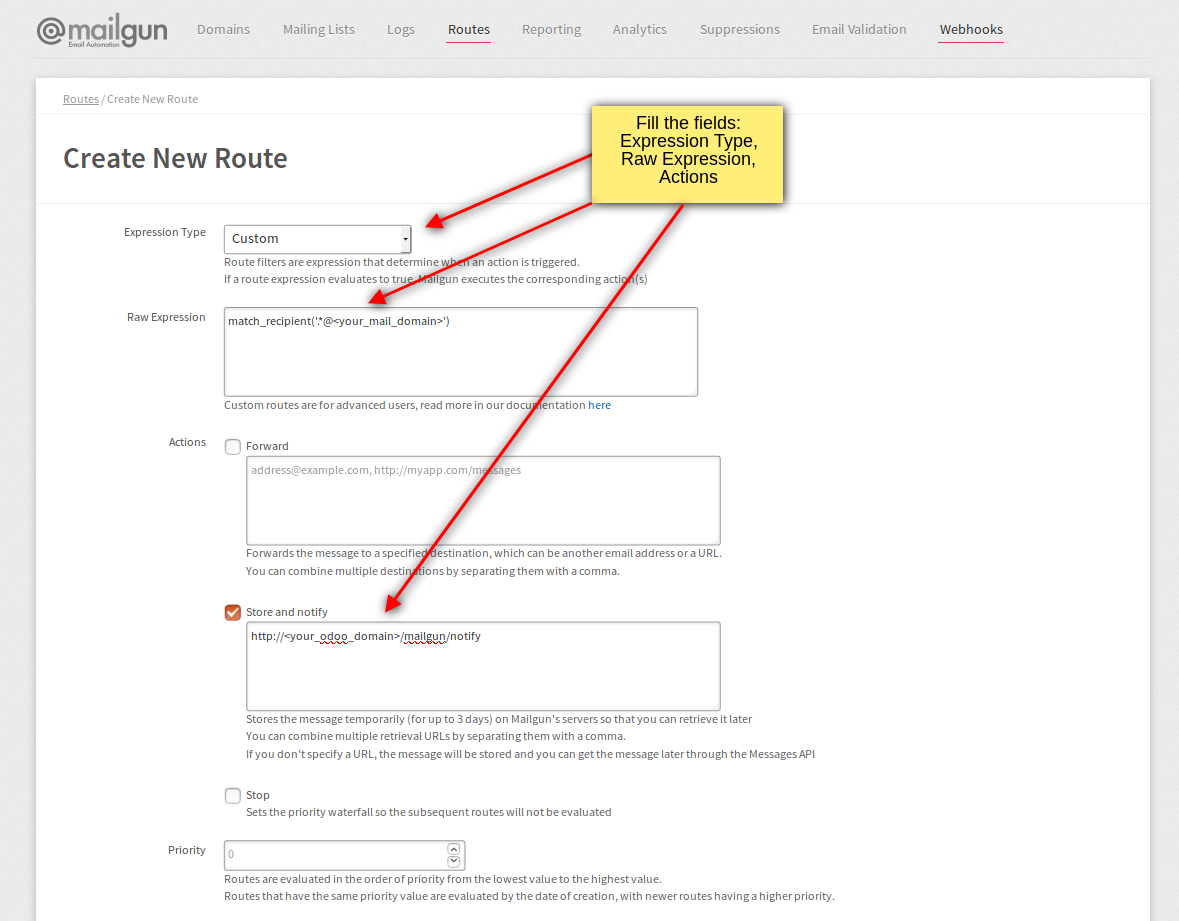
Set the following fields and values:
Now everything is ready to move to Odoo configuration.
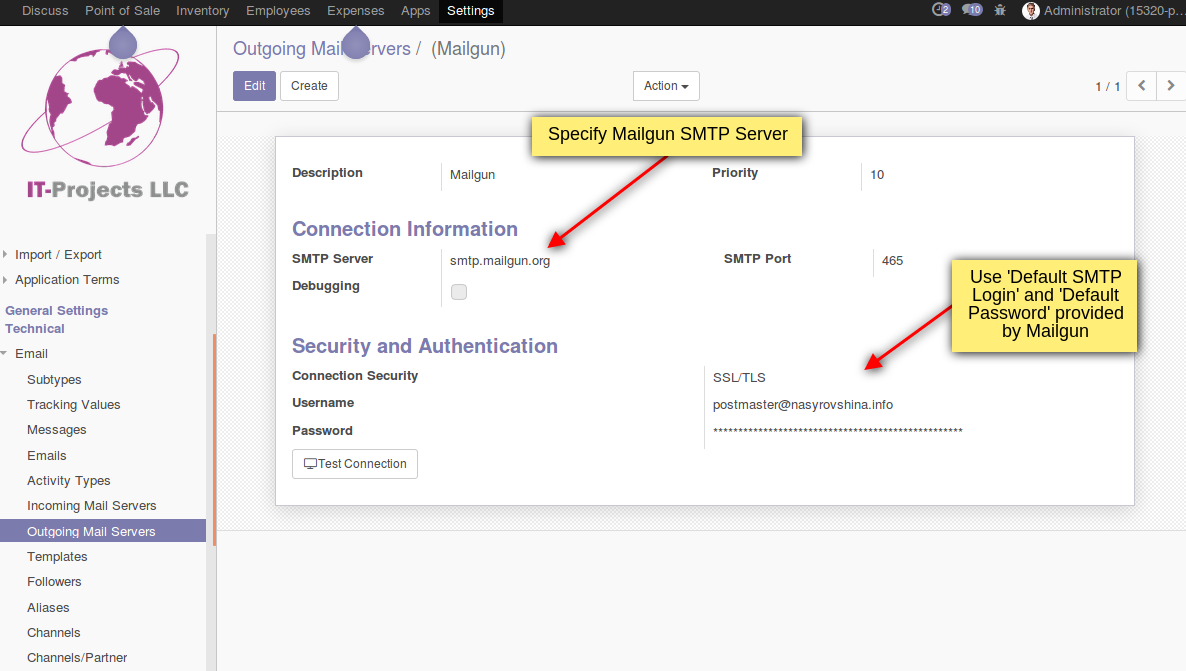
At first, activate the developer mode. Then go to Settings → Technical → Email → Outgoing Mail Servers menu and populate the following fields:
Once the fields are populated, click Test Connection button to check the connection to smtp server. If everything is ok, you can see popup message Connection Test Succeeded! Everything seems properly set up! and you are able to send messages now.
Note that to setup incoming mailing, it is not required to setup Incoming Mail Server.
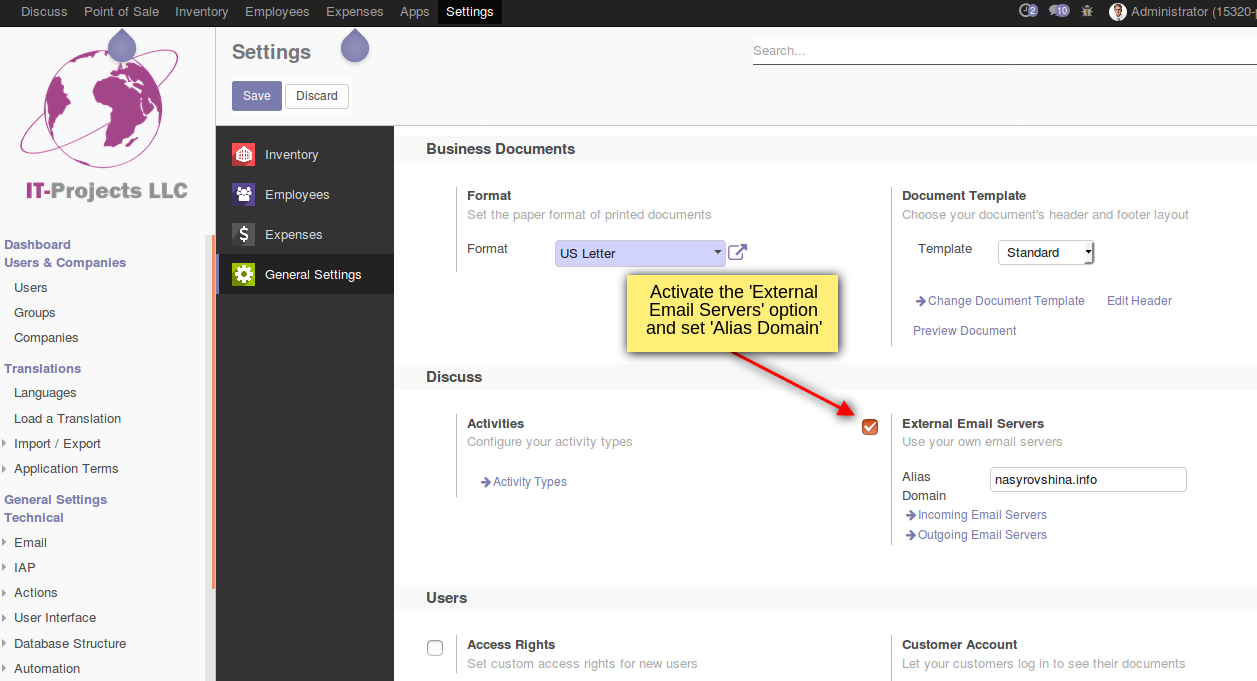
Open Settings → General Settings menu:
Save the changes.
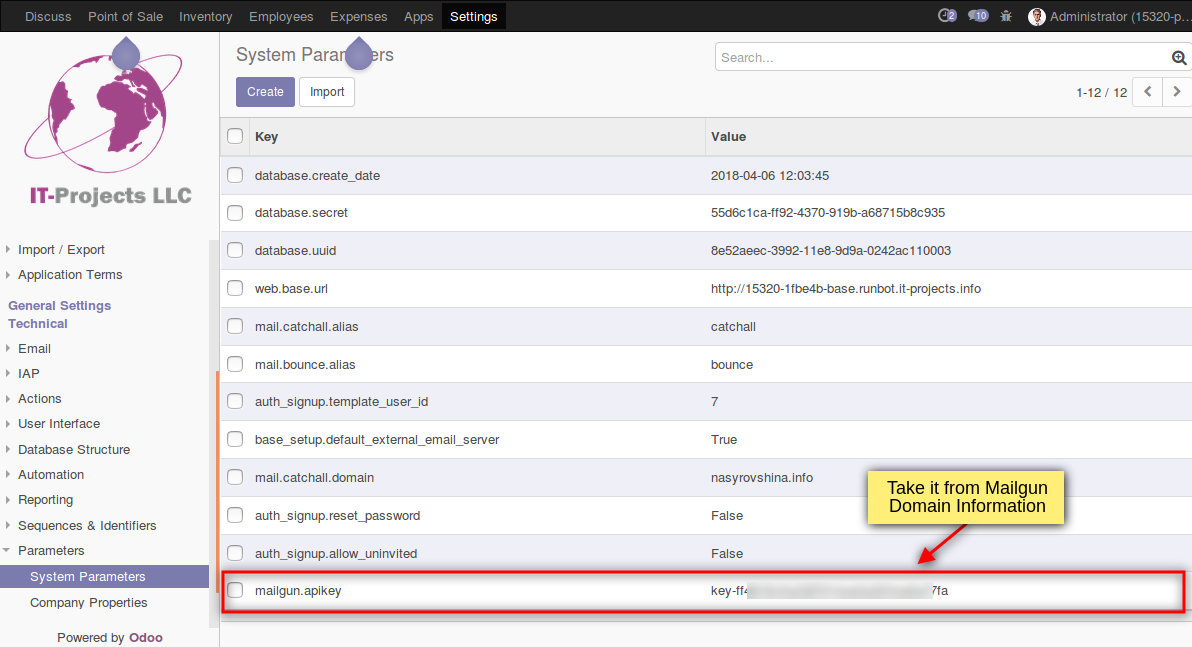
Setup mailgun API credentials in Settings → Parameters → System Parameters menu. Create new parameter:
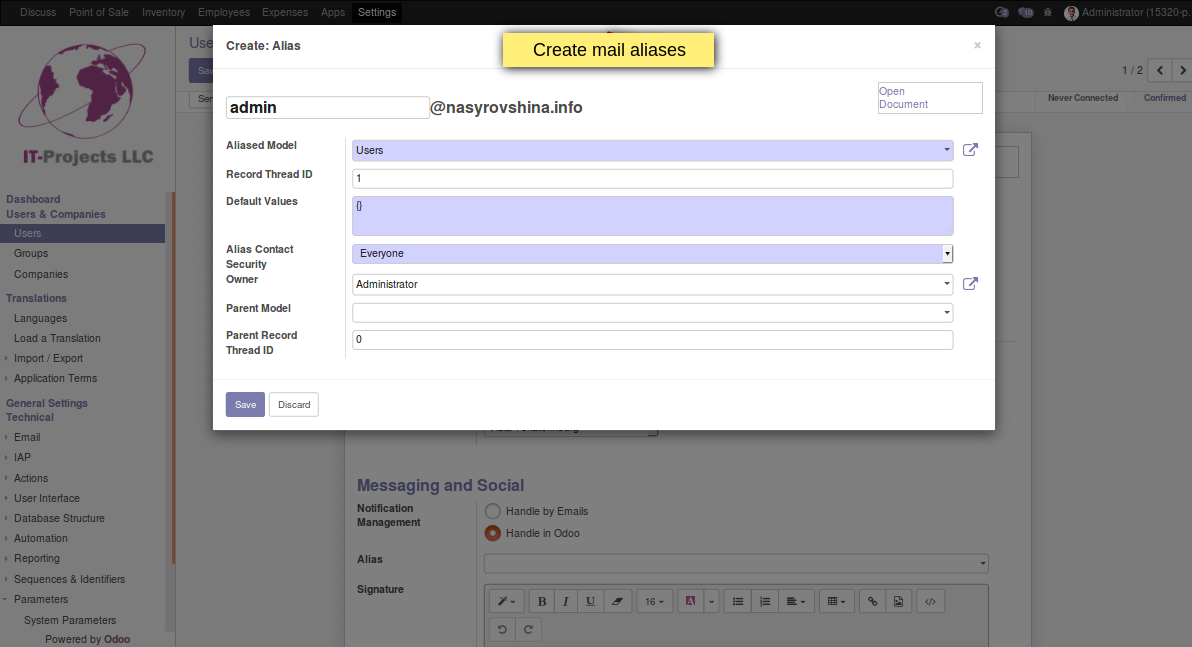
Now you can configure mail aliases for users. Go to Settings → Users menu and open user form (e.g. for Administrator). Then switch to Preferences tab and select an existing alias or create new one in the Alias field.
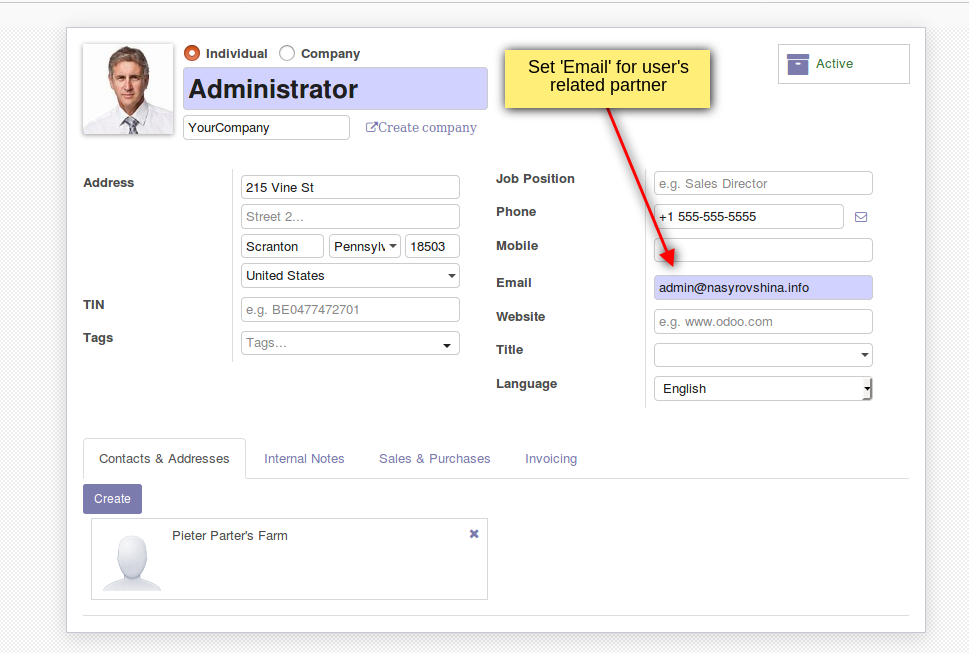
Open the user's related partner and set Email - the email is used for replying on user messages
Everything is done! It's time to send/receive email messages now!
Contact us by email or fill out request form